Creating a Timetable in LaTeX
Table of Contents
You may want to jump straight to the timetable generator otherwise, here’s some background on how I created a general purpose timetable generator for my class 😁
Download the timetable here and the period input here.
An Intro to $\LaTeX$
$\LaTeX$ is a typesetting system that is used to create professional looking documents. It is a very powerful tool which is used by professionals in every field.
It supports a wide range of features, including:
- Mathematical equations
- Tables
- Figures
- Including TikZ graphics
- etc.
You can extend the functionality of $\LaTeX$ by installing packages which are available on the CTAN library.
And most importantly, it is free and open source!
With the benefits of using $\LaTeX$ comes the cost of learning the syntax. This is a very steep learning curve, but once you get the hang of it, you will never want to go back to using a word processor again.
The Purpose
The timetables that we use in our class are very simple and often not very aesthetically pleasing. They are very cluttered and hard to read.
Hence I decided to create a timetable that while being easy to read and attractive to look at also had the ability to be procedurally generated. This would allow someone to easily create non-conflicting timetables for different classes and semesters.
How I did it
The basic idea is to generate a table in $\LaTeX$ procedurally using JavaScript. You can look at the source code of the timetable generator here. However as a quick overview for the beginner, here’s how you can create tables in $\LaTeX$.
Creating a Table
To create a table in $\LaTeX$ you use the tabular environment. This
environment takes a single argument which is a string that describes the layout
of the table.
For example, the following code creates a table with 3 columns and 2 rows.
\begin{tabular}{c | c c}
  1 & 2 & 3 \\ \hline
  4 & 5 & 6
\end{tabular}
The c in the argument string tells $\LaTeX$ that the column should be
centered.
You can also specify the alignment of the columns using the l and r
characters.
Anyways, here’s how you can use the TimeTable generator.
Using the TimeTable Generator
The form below allows you to create your timetable.
Submit the number of columns in the timetable and the number time on which
your classes start.
Specify the amount of time between each class in minutes as the Time Step.
Finally, specify the individual slots in the timetable.
Period Syntax
The syntax for specifying a period is as follows:
( <subject title> > <course subtitle> ) [ <Day><slot start>-<slot end> <Day><slot start>-<slot end> ... ]
...
The subject title and course subtitle are specified in parentheses and
separated by a >.
The Day is specified as a single character, where A is Monday, B is
Tuesday, and so on.
The slot start and slot end are specified as a single character, where 1
is the first slot, 2 is the second slot, and so on.
The slot start and slot end are separated by a -.
The slot start and slot end are inclusive.
The slot start and slot end can be the same.
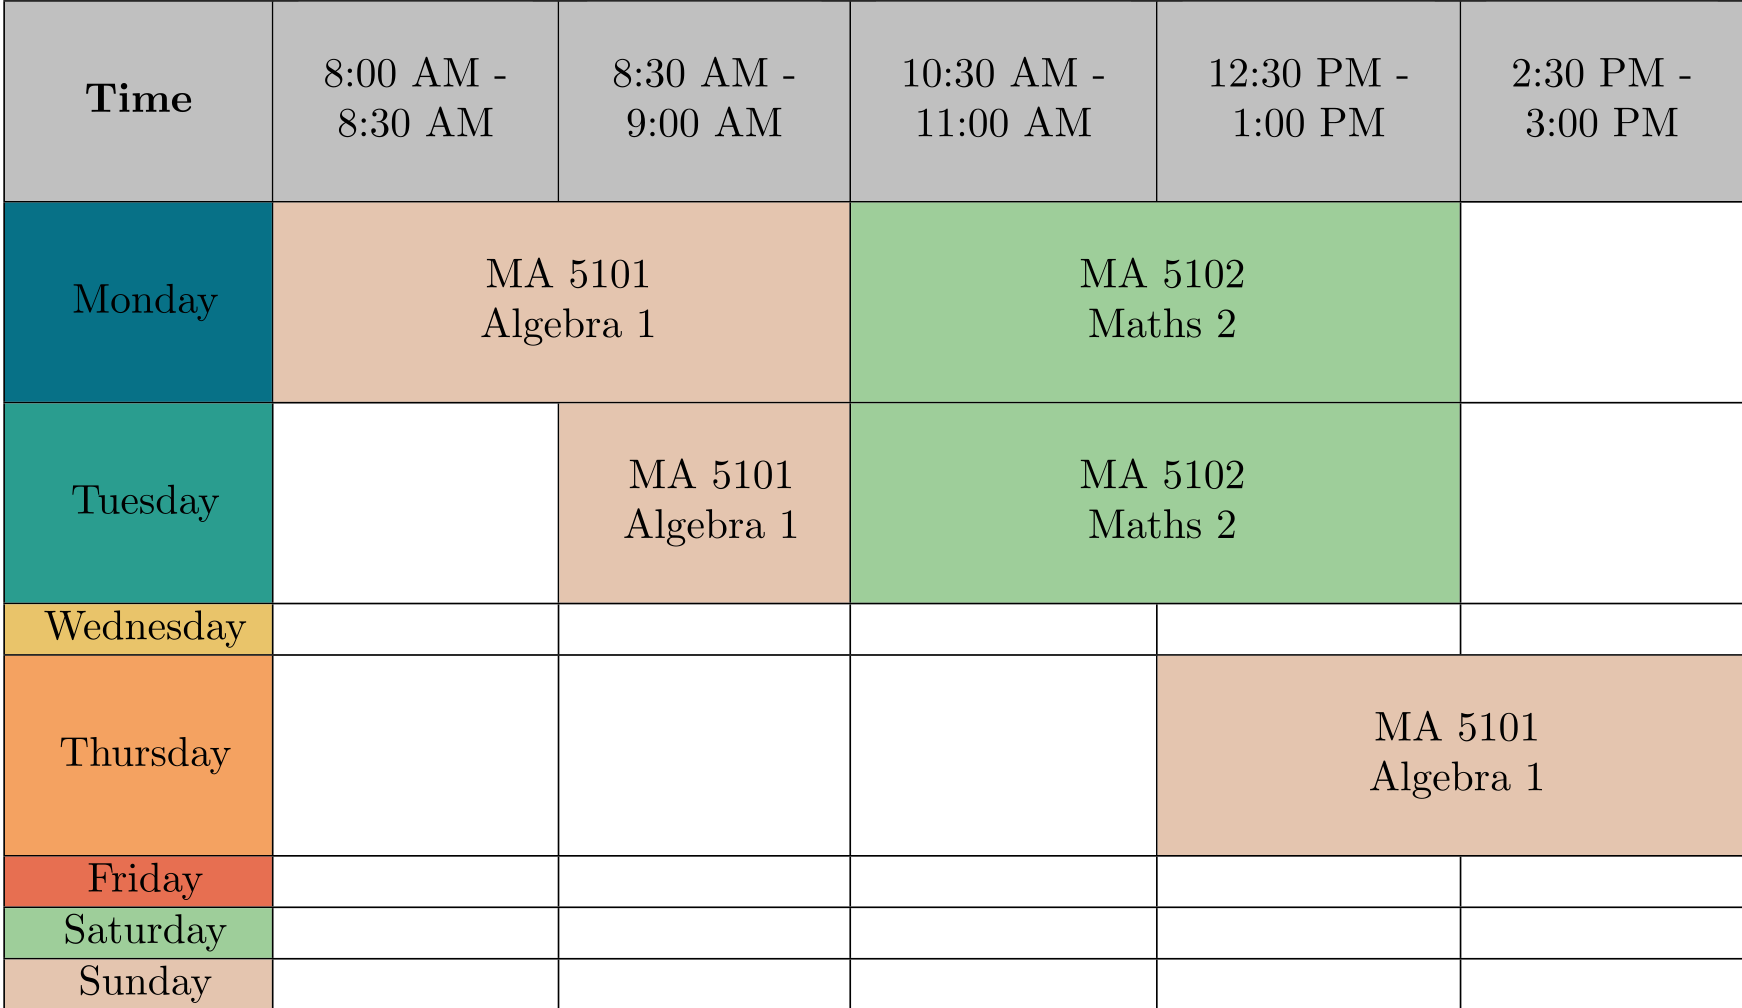
For example the given example would generate the following table.
You can generate the timetable by clicking the Generate button. The generated
timetable is a .tex file which you can compile using your favourite $\LaTeX$
compiler.
I’d recommend using Overleaf as it is pretty easy to use and doesn’t need any setup.
The compiled pdf file can be downoaded here:
Timetable
Timetable Generator
Conclusion
I hope you enjoyed this post and found it useful. If you decide to create a timetable for your class, please share how it went in the comments below.